Finding Your Perfect Blush Placement: 8 Tips for Every Face Shape
Updated September 6, 2023.
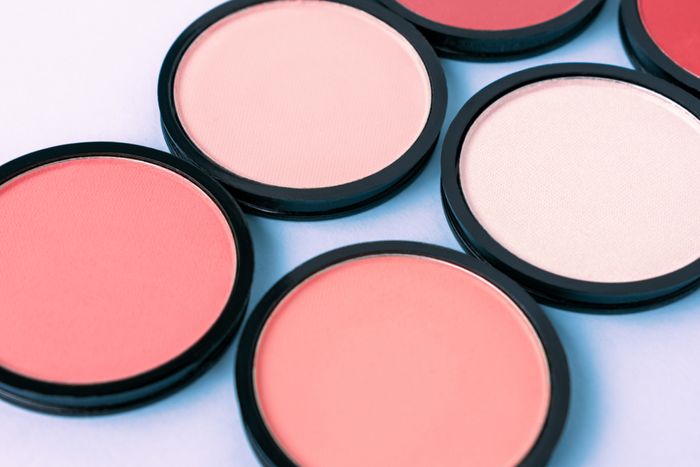
Adding a flush of color to the cheeks with blush can help warm the complexion by mimicking a healthy, vibrant glow or even sculpt the face by accentuating the cheekbones and other facial features. According to research, purchases of blush overall increased by 17% from 2020 to 2022, indicating a growing interest in this makeup essential.
From the start of my makeup application journey, I could pick up techniques easily. Blush, on the other hand, was tough to get used to. Luckily, I learned that blush placement is never one-size-fits-all. In this article, I'll share tips on blush placement for different face shapes so you can master this important makeup technique.
Blush Placement for Different Face Shapes
Finding the most flattering blush placement can seem daunting, but it doesn't have to be. The secret is understanding how your face shape should guide your blush application.
Blush does two main things:
- It adds much-needed color to your skin
- Enhances your natural features by giving you a radiant, healthy glow
1. Blush Placement for Round Faces
The round face is characterized by a circular shape with full, soft cheeks and a less defined jawline and chin. While round faces have an inherent warmth and youthfulness, blush application is key to adding more structure and dimension. The goal is to slim the appearance of the cheeks while enhancing the eyes, cheekbones, and jaw.
Steps for applying blush on round faces:
- Apply above the apples of your cheeks
- Sweep in a diagonal line towards your temples
- Use a light hand and build up the color gradually
2. Blush Placement for Oval Faces
An oval face shape is marked by its proportional width and length as well as a softly curved jawline. The objective when applying blush to an oval face is to accentuate this natural symmetry while adding a touch of width and contour for extra definition. By doing so, you can create a radiant and youthful appearance that highlights your face's innate harmony.
Steps for creating a youthful appearance on an oval shape:
- Apply blush on the apples of your cheeks
- Blend slightly upwards towards the temples
Tip: Choose blush shades that add a natural glow to your skin, such as soft pink, peaches, or corals. These colors contribute to a radiant and youthful appearance.
3. Blush Placement for Heart-Shaped Faces
A heart-shaped face is characterized by a broad forehead and wide cheekbones that taper down to a petite, narrow chin. This shape creates a captivating yet sometimes uneven appearance, making strategic makeup application essential for balance.
Steps to Soften a Prominent Forehead and Define the Chin:
- Apply blush on the lower apples of your cheeks
- Use a fluffy brush for blending and ensure there are no harsh lines
- Blend it slightly upwards towards the temples
- Apply a light touch of blush on the chin to give it a fuller appearance
- Choose a blush shade that complements the rest of the makeup
This technique draws attention away from the forehead and adds balance to the lower part of the face.
4. Blush Placement for Square Faces
A square face shape is characterized by its strong jawline, broad forehead, prominent cheeks, and straight hairline, all of which contribute to an angular and structured appearance. While this shape is naturally striking, the right blush placement can be a game-changer in softening those sharp angles and bringing balance to your face.
By focusing on strategic areas, you can turn your square face into a more refined canvas that highlights your eyes and cheekbones.
Steps for Applying Blush for Square Face:
- Apply blush to the apples of your cheeks for a softer look
- Blend blush in a circular motion for softer features
- Blend blush upwards towards the hairline for a natural gradient and softer look
After you've successfully softened angular features, consider these compatible makeup styles to further complement the softened edges:
- Natural Smokey Eye: A soft, natural smokey eye can add depth and dimension without adding harshness, making it a perfect complement to your softened features.
- Nude Lips: Opt for nude or soft pink lip shades that won't compete with your blush but will add to the overall soft and harmonious look.
- Dewy Finish: A dewy foundation finish can add to the softening effect, giving your skin a youthful, radiant glow.
- Soft Contour: If you still want some definition, go for a soft contour that subtly enhances your natural features without making them appear too sharp.
- Muted Eyeliner: Instead of a sharp winged eyeliner, try a softer line, or even a smudged eyeliner look to keep everything soft and balanced.
5. Blush Placement for Diamond Faces
A diamond face shape is marked by its high, chiseled cheekbones, a narrow forehead and chin, and an elongated overall appearance. While naturally captivating, the right blush placement is crucial for harmonizing these unique proportions.
Skillfully applied blush can elevate a diamond face shape, drawing attention to your eyes and sculpted cheekbones while achieving a balanced look.
Steps for Highlighting Cheekbones:
- Start Clean: Begin with a clean, moisturized face and your usual foundation and concealer.
- Choose the Right Shade: Opt for a blush color that complements your skin tone and the rest of your makeup.
- Pick the Right Brush: Use a fluffy, angled blush brush for precise application.
- Placement: Apply blush directly on the highest point of your cheekbones, where they are most prominent.
- Blend Upwards: Blend the blush upwards towards your temples in a diagonal line, following the natural line of your cheekbones.
- Soft Blend: Use a clean, fluffy brush to blend out any harsh lines for a seamless finish.
- Check Balance: Take a step back and assess. Add more products if needed, but remember, less is more.
6. Blush Placement for Long Faces
For a long face shape, which is marked by an elongated silhouette and similar widths of the forehead, cheekbones, and jawline, the goal is to visually shorten the face.
To achieve this, apply blush horizontally across the apples of your cheeks. Start from the area directly under your eyes and extend the color towards your ears. This placement helps to counterbalance the vertical length of the face.
Steps to Achieve a Harmonious Look for Long Faces:
- Choose the Right Brush: Opt for a fluffy blush brush to achieve a soft, diffused look.
- Start Small: Begin with a small amount of blush to avoid over-application.
- Blend in Circles: Use circular motions to blend the blush, focusing on the center of your cheeks
- Build Up Color: Gradually add more products to achieve a natural appearance.
- Suitable Blush Color: Choose warm, peachy tones or soft pinks. These shades add a youthful glow and harmonize well with the natural undertones of a long face.
7. Blush Placement for Chubby Cheeks
If you're graced with fuller cheeks, the art of blush application lies in achieving both balance and a radiant glow. The right placement and shade of blush can accentuate the cheeks, lending a vibrant yet harmonious appearance. Skillfully applied color in strategic areas will elevate your cheeks to their most radiant and sculpted best. This technique lifts the face and creates a slimming effect.
The goal is to add a healthy glow without emphasizing the fullness. Using a light hand and blending well ensures that the blush complements rather than overwhelms the cheeks.
Expert Tip: Try natural shades like soft pinks or muted peaches to enhance the cheeks subtly. These colors add a touch of radiance without overwhelming the face. Steer clear of overly dark or bright shades, as they can make the cheeks appear heavier.
8. Blush Placement for High Cheekbones
For people who have naturally high cheekbones, a delicate touch is key when applying blush to highlight without overwhelming this striking feature.
High cheekbones naturally draw attention to the middle of the face, creating a lifted appearance. Because of this, the blush application should be subtle to enhance rather than overshadow this feature.
Steps for Blush Placement to Accentuate High Cheekbones:
- Use buildable and blendable formulas like powder or cream blushes. These types of blush give you more control and result in a natural finish.
- Apply the blush at the highest point of your cheekbones.
- Blend it diagonally towards the temples.
This placement not only highlights the cheekbones but also adds a natural lift to the face, especially when on the hollows of the cheeks.
Expert Tip: Avoid overly shimmery or glittery blushes, as they can make the cheekbones appear too prominent or harsh.
Blushing Your Way to Perfect Harmony
While following recommendations is helpful, don’t be afraid to get creative and find what flatters you best. Tools like the Klever Beauty Box make exploration fun through an element of surprise. This subscription box delivers eight mystery makeup products monthly, including an array of blushes ideal for enhancing your face shape.
With the tricks you’ve learned, you can now tailor your blush for a polished, professional makeup look that accentuates your natural beauty.
